Configure room settings
To customize the behavior for a room display, find it in the list and
click the gear icon ⚙.

The room details dialog will appear with the SETTINGS tab pre-selected.
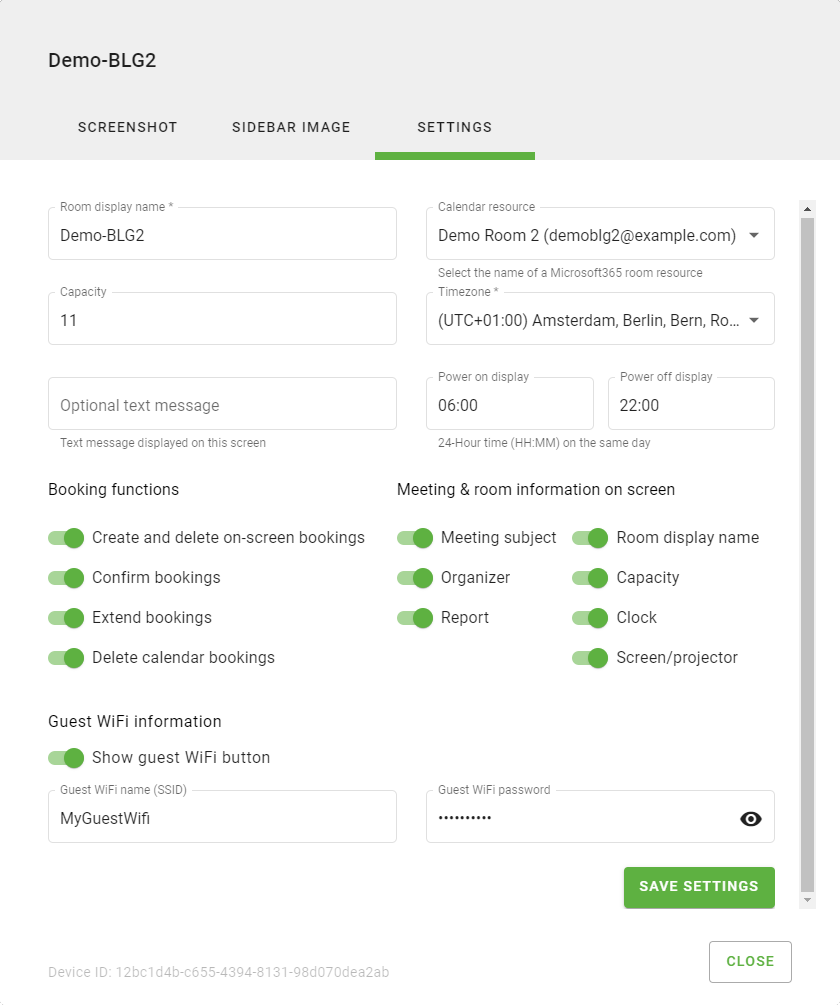
Please refer to the table below for a description of each setting. Adjust the settings to your liking and finish by clicking SAVE SETTINGS.
Settings
| Setting | Description | Default |
|---|---|---|
| General | ||
| Room display name | The name to use for the room on the screen, enables you to use a different name than the resource name from the calendar service | Calendar service resource name |
| Calendar resource | Select the calendar resource to show on this
display, the list is provided from your calendar service. For tenants with 100+ rooms you may need to input the identity of the calendar manually. |
|
| Capacity | The allowed capacity of the room | 0 |
| Timezone | The timezone of the room/display. Set it so that meetings can be shown at the correct time | Auto-set according to Country |
| Optional text message | Input an optional text message, this message will be displayed on the screen | |
| Power on display | Time of day that the screen should turn on (exit power save) | 06:00 |
| Power off display | Time of day that the screen should turn off (enter power save) | 22:00 |
| Booking functions | ||
| Create and delete on-screen bookings | Allow users to create bookings on screen and delete bookings created on the screen | On |
| Confirm bookings | Users must to confirm bookings on screen. If enabled, unconfirmed bookings will be cancelled by the screen automatically | Off |
| Extend bookings | Allow users to to extend bookings on screen | On |
| Delete calendar bookings | Allow users to to delete/cancel bookings from its connected calendar on the screen | Off |
| Information on screen | ||
| Meeting subject | Show the subject of the meeting on screen, if disabled a generic text will show instead (BOOKED) | On |
| Organizer | Show the organizer of the meeting on screen | Off |
| Report | Show button to report broken equipment in room | On |
| Room display name | Show the display name of the room on screen | On |
| Capacity | Show the capacity of the room on screen. Please remember to set the capacity too. | Off |
| Clock | Show the current time on screen | On |
| Screen/projector | Set if the room is equipped with a screen or projector, an equipment icon will be shown on screen if enabled | Off |
| Show guest WiFi button | Show guest WiFi information on screen | Off |
| Guest WiFi name (SSID) | The SSID name of the guest WiFi (to show on screen, not related to display network connection) | empty |
| Guest WiFi password | The password of the guest WiFi (to show on screen, not related to display network connection) | empty |
Sidebar image
It's possible to upload your own image to be shown on the room display.
This is done for each display on the SIDEBAR IMAGE tab of the room
details dialog.
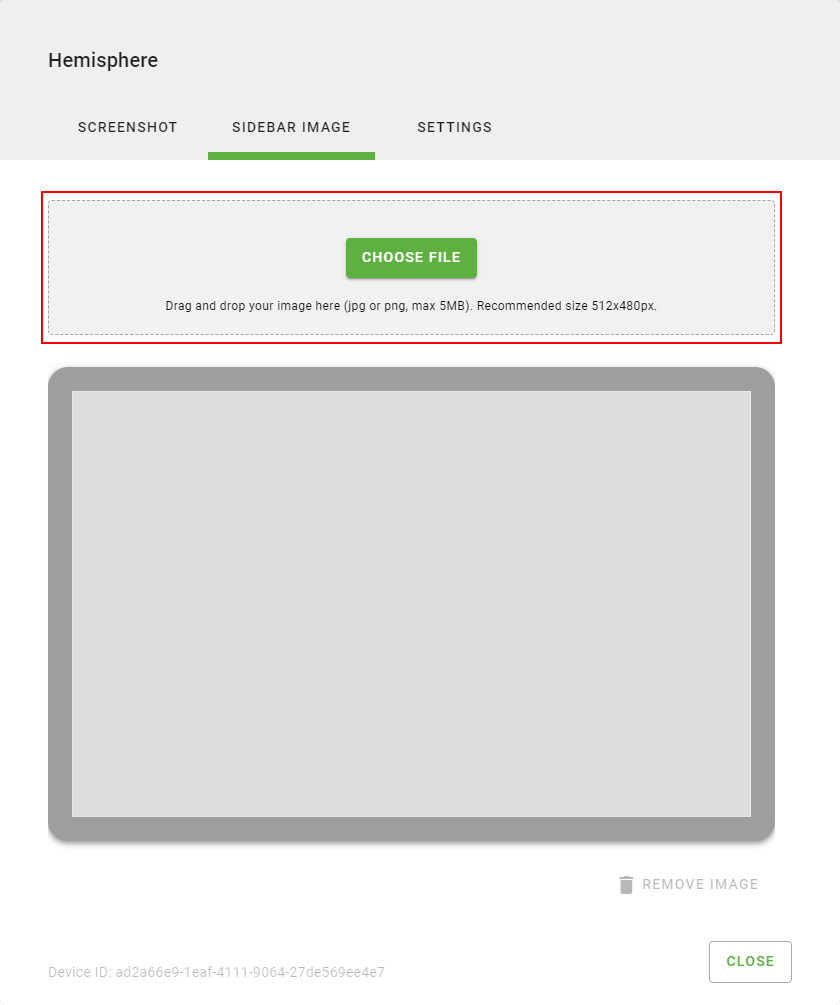
To upload, either click CHOOSE FILE or drag and drop an image on they
grey area around the button.
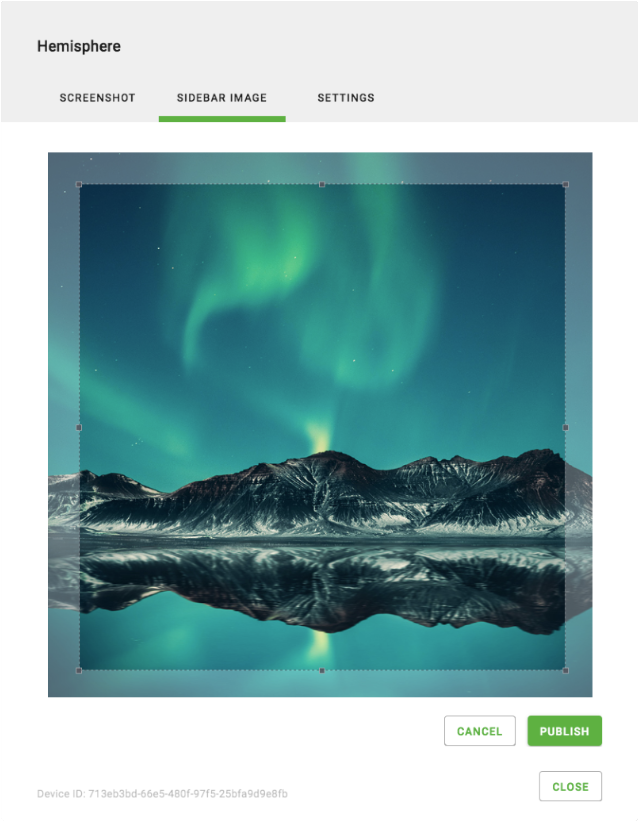
Once the image has uploaded, you must select which part of the image
should show in the display. Adjust the square to your liking and the
click PUBLISH.
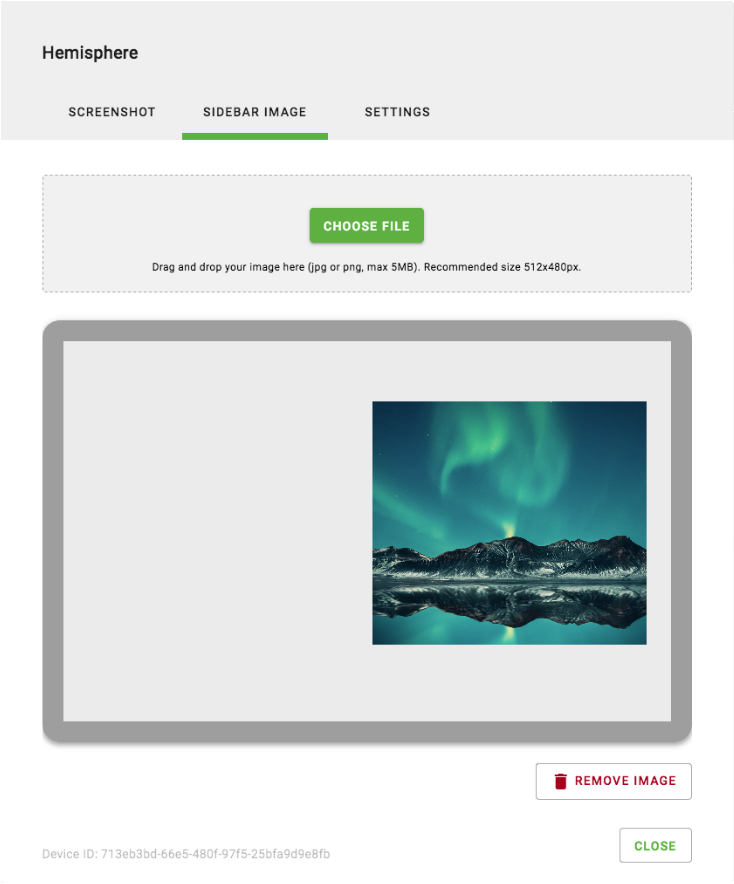
An approximate preview will show in the dialog. You can remove existing image by clicking REMOVE IMAGE or replace it by uploading a new file.
To see the exact result, you can switch to the SCREENSHOT tab. The screenshot is sent by the display itself so it's an exact copy of what's showing on screen.